Hi Everyone,
Its Keren here for the Blue Fern Studios blog for the last time.
After 3 amazing years being on the Blue Fern Studios Design Team it is time for me to say goodbye.
It was wonderful to be part of the team for so long and use their wonderful products.
I'm very grateful to have had this opportunity!!!
Here are my projects for this post!!
"Scandinavian Winter"
I created this 5x7 canvas depicting a scandinavian winter.

I used the Tree Trimmings paper from Vintage Christmas 2 collection for the background.
I embossed 2 of the Winter Village chipboard pieces and a snowflake with Icicle embossing powder and then added some gold glitter on it.
Once I glued everything I added some snow paste to enhance the winter feel.

<<<<<<<<<<<>>>>>>>>>>>
"Winter"

I created this wintery layout using a picture of myself from a few winters ago.
I used the back of the Holiday Cards paper from the Vintage Christmas 2 for the background.

I used the large chipboard flake to frame my photo. I cut the inside of the flake so I would have a space in the middle to frame my photo. Then I embossed it with Sea Mist embossing powder.

I used some shabby flakes and winter flakes to embellish around the frame. I embossed them along with the Winter title with Snow embossing powder.
I also added some snow paste to enhance the wintery feel.

<<<<<<<<<<<<<>>>>>>>>>>>>>
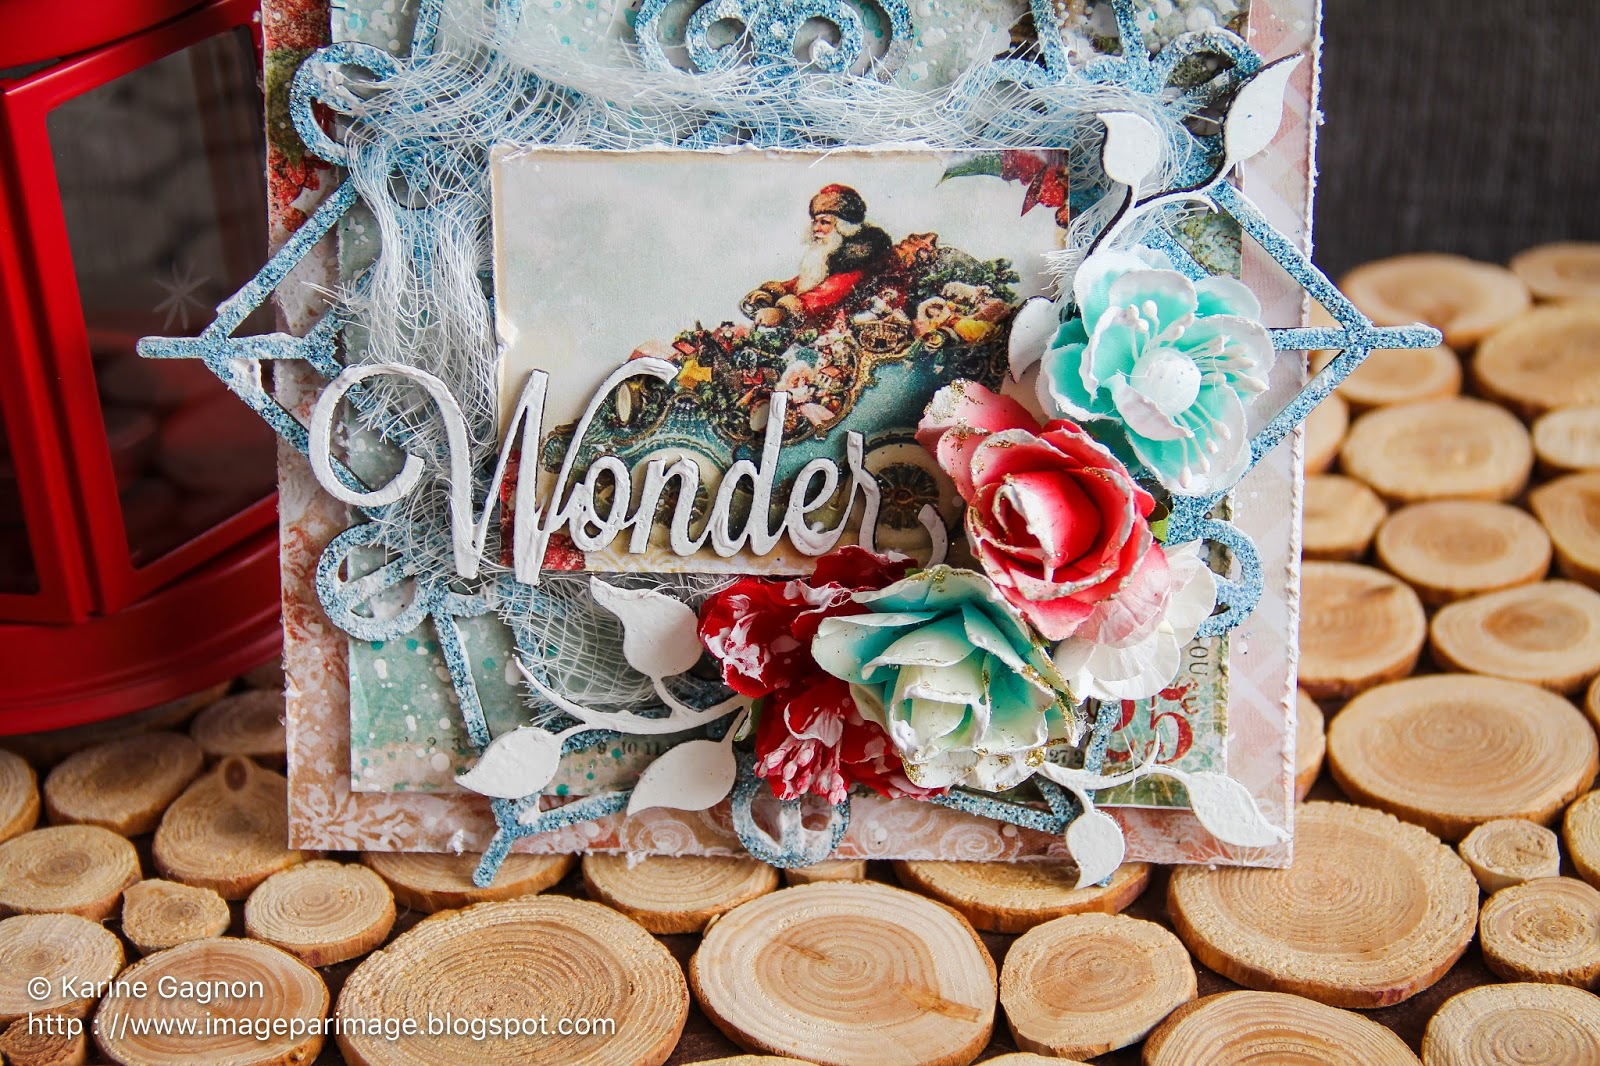
"Chritmas Cards"
Finally I created 3 Christmas cards:

The first one uses both the Vintage Christmas collections and the Dangle flake as an embellishment. The chipboard was embossed with Golden Bricks embossing powder.

The Second Card also uses both Vintage Christmas collections

To embellish I added some Blue Fern blooms and a Holiday Deer that was also embossed in golden Bricks embossing powder

For the last card, I used the Deer ornament which was embossed in 14 karat embossing powder.

I used some flowers and cheesecloth to embellish the card as well!!

Thank you so much for visiting Blue Fern Studios Blog
and thank you for supporting me for so many years!!!
Have a Merry Christmas and a Happy and Healthy New year!!
Love,
Keren